
The dado meaning in carpentry refers to a groove or channel cut across the grain of a wood piece. It is one of the most essential joinery techniques used in furniture making, cabinetry, and interior paneling. Understanding dado meaning helps both beginners and pros create stronger, better-looking wood projects with clean, precise joints.
Have you ever looked at a beautifully crafted bookshelf or a classic cabinet and wondered what holds those shelves so securely in place? The answer often lies in a simple but powerful woodworking technique known as a dado. Understanding dado meaning opens up a whole new world of woodworking knowledge. Whether you are a weekend DIYer or someone just curious about how furniture is built, this guide breaks it all down in plain language.
The dado meaning in carpentry is straightforward. A dado is a slot or groove cut into a piece of wood. This groove runs across the grain, which means it goes perpendicular to the wood fibers. Woodworkers use dados to join pieces together, to hold panels in place, or to create decorative effects in furniture and wall treatments. It is one of the oldest and most reliable joinery methods in woodworking history.
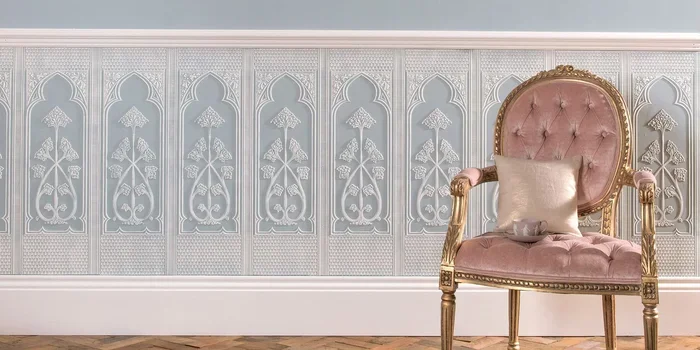
In interior design, the term takes on a slightly different but related role. A dado rail, for example, is a horizontal molding strip attached to a wall. It marks the boundary between the lower paneled section and the upper wall surface. Both meanings share the same root idea: a groove, slot, or structural element that adds strength and style to a piece or a room.
So why does dado meaning matter so much? Because whether you are building a cabinet, installing wainscoting, or repairing an old piece of furniture, knowing how dados work gives you the confidence to tackle projects with precision. A well-cut dado joint is tight, clean, and surprisingly strong. It is the kind of technique that separates a basic DIY project from a truly professional result.
Throughout this article, we will explore every angle of the dado. We will look at the different types, the tools you need, step-by-step cutting methods, and how dado work fits into modern interior design. By the end, you will have a thorough understanding of dado meaning and the skills to use it in your own projects.
Key Takeaways
- A dado is a groove cut into wood: It runs across the grain and is used to hold panels, shelves, or other pieces in place.
- Dado joints are incredibly strong: They create tight-fitting connections without the need for screws or nails in many cases.
- Multiple types exist: Through dado, stopped dado, and dado rails serve different design and structural purposes.
- You need the right tools: A dado router bit, dado stack, or shoulder plane can all be used to make clean dado cuts.
- Dado work appears everywhere: From kitchen cabinets to wainscoting and built-in bookcases, dado cuts are a staple in both carpentry and interior design.
- Practice makes perfect: Testing your dado depth and width on scrap wood before cutting your final piece saves time and material.
📑 Table of Contents
What Is A Dado In Carpentry?
At its core, the dado meaning in carpentry is a groove or channel cut into a board. The cut goes across the wood grain, not along it. This distinction matters a lot. A rip cut follows the grain, but a dado cut goes perpendicular to it. That perpendicular approach is what gives the dado its incredible strength.
Think of a dado like a slot in a puzzle piece. When two pieces of wood fit together through a dado joint, they lock into place. The surrounding wood presses against the groove, creating friction and hold. No glue, no screws, no nails needed in many cases. That is the beauty of traditional joinery.
Carpenters use dado joints in all kinds of projects. Shelving inside cabinets is one of the most common applications. Bookcase shelves often sit inside dados cut into the vertical bookcase sides. Tabletops get attached to aprons using dado joints. Even drawer bottoms can be set into grooves that function as dados.
The dado cut has three key measurements. The width is how wide the groove is. The depth is how deep it goes into the wood. And the shoulder is the short section left uncut where the groove meets the edge. Getting these three measurements right is what separates a sloppy job from a perfect one.
Through Dado vs. Stopped Dado
Not all dados are the same. Two of the most common variations are the through dado and the stopped dado.
A through dado is a groove that goes all the way through the piece of wood. You can see it from both sides. Through dados are strong and straightforward, but they leave visible cut marks on the back side. They work well in projects where the back will not be seen, like a cabinet that sits against a wall.
A stopped dado, also called a blind dado, starts and stops somewhere within the wood. It does not break through to the other side. This is the go-to choice when you want a clean look on both faces of the wood. Furniture makers love stopped dados because they hide the joint completely.
A housing joint is a close cousin of the dado. The main difference is that a housing joint is cut along the edge of a board, while a dado is cut across the face. Both serve similar purposes and both rely on the same basic principle of a groove that holds another piece securely.
Tools You Need To Cut A Dado
Making a clean dado cut starts with having the right tools. You do not need a fancy workshop to get great results. The right dado router bit or a simple dado stack on your table saw can handle most jobs with ease.
Here are the most common tools used for cutting dados:
- Dado router bit: This is a flat-bottomed cutting bit that fits into a router. It comes in various widths, so you can match the groove size to your project. A router with a guide fence gives you straight, consistent cuts every time.
- Dado stack blade: This is a set of saw blades that you stack together on a table saw. The combined width of the blades matches the width of the dado you want. It is one of the fastest ways to cut dados in production woodworking.
- Shoulder plane: For hand-tool woodworking, a shoulder plane lets you clean up dado edges by hand. It is slower but gives you excellent control and a very smooth finish.
- Table saw with a standard blade: You can make multiple passes with a regular blade, raising it a little each time. This works but takes more patience and careful setup.
- Hand saw and chisel: The old-school method. You mark out the dado, saw the sides, and then chop out the waste with a sharp chisel. This technique gives a satisfying handcrafted result.
No matter which tool you choose, the key is accuracy. Measure twice, cut once. Use a test piece of scrap wood to dial in your depth and width before working on your actual project. This simple habit saves material and frustration.
Setting Up Your Dado Cut
Getting the setup right is half the battle. Start by checking the width of the dado blade or router bit against your project requirements. Most shelf dados are about one-quarter to one-third the thickness of the side panel. A common size is three-eighths of an inch wide for standard cabinetry.
Next, set the depth of the cut. The general rule is to make the dado about one-third the thickness of the wood. So if your board is three-quarters of an inch thick, the dado depth should be roughly half an inch. This leaves enough material on both sides of the groove to maintain strength.
Use a test scrap piece to make your first cut. Slide it through the router or table saw and check the fit. The dado piece should slide in with firm hand pressure. If it is too loose, adjust the depth or width slightly and try again. If it is too tight, you risk splitting the wood. A snug fit with light tapping is the sweet spot.
How Dado Work Fits Into Interior Design
The dado meaning in interior design goes beyond just joinery. It also refers to a specific section of a wall and the decorative elements associated with it. When you walk into a traditional room with paneled walls, the lower portion is often called the dado.
This lower wall section typically extends from the floor up to about three feet high. It is separated from the upper wall by a dado rail, which is a horizontal molding strip. Above the dado rail, the wall might be painted, wallpapered, or covered with fabric. Below the rail, you often find wood paneling, tile, or wainscoting.
The dado rail serves both a practical and decorative purpose. Practically, it protects the lower wall from damage caused by furniture, cleaning, and everyday use. Decoratively, it creates a visual break that adds architectural interest to an otherwise flat wall surface.
In modern interior design, the dado concept lives on in many forms. Raised panel doors use a centered panel set into a frame, which is essentially a frame-and-panel construction that relies on grooves similar to dados. Built-in bookcases feature dados for adjustable shelf positions. Even some modern headboards and room dividers incorporate dado-style grooves for a clean, tailored look.
Wainscoting And The Dado Connection
Wainscoting is one of the most popular applications of dado work in interior design. Wainscoting refers to the decorative paneling that covers the lower part of a wall. The panels are often set into grooves cut into the wall framing or into separate framing members.
The dado rail sits at the top of wainscoting, capping the paneled section. Below the rail, you may see raised panels, recessed panels, or flat boards arranged in a grid pattern. Each panel fits into grooves that function just like dados. The result is a polished, tailored look that adds warmth and character to any room.
In traditional English and Victorian homes, wainscoting with a dado rail was standard in dining rooms, hallways, and libraries. The style has made a strong comeback in modern farmhouse, transitional, and classic interior design schemes. Homeowners love wainscoting because it adds architectural detail without the cost of full wall paneling.
Dado Meaning In Furniture Making
Furniture makers rely on dados more than almost any other joinery method. The dado joint appears in bookcases, desks, entertainment centers, dressers, and cabinets. Its simplicity and strength make it a favorite for both handcraftsmen and modern manufacturing.
Consider a basic bookcase. The vertical sides have dados cut into them at each shelf position. The shelves slide into those dados and are held securely by gravity and friction. Some furniture makers add glue or small wooden pins for extra security, but a well-fitted dado alone can hold a shelf for decades.
In cabinetmaking, the dado is everywhere. Base cabinets often have a dado cut into the sides to hold the bottom panel. Face frames may feature dados for the cabinet back. Even drawer construction sometimes uses a dado to attach the drawer bottom to the sides and front.
The dado stack on a table saw has revolutionized furniture production. With the right setup, a carpenter can cut a perfect dado in seconds. This efficiency is why dado joints remain the go-to choice in both custom furniture shops and large-scale manufacturing operations.
Dado Joint Strength Comparison
How does a dado joint compare to other common joinery methods? Here is a quick look at the strengths and weaknesses of several popular techniques.
| Joint Type | Strength | Ease Of Cutting | Best Use |
|---|---|---|---|
| Dado Joint | Very High | Easy | Shelves, panels, cabinets |
| Dovetail Joint | Excellent | Difficult | Drawer corners, fine furniture |
| Butt Joint | Low | Very Easy | Basic framing, quick builds |
| Rabbet Joint | High | Easy | Case sides, backs, panels |
| Mortise and Tenon | Excellent | Moderate | Table legs, frame joinery |
As you can see from the table, the dado joint offers an excellent balance of strength and ease. It is not the most complex joint, but for shelf and panel applications, it is hard to beat. The dado meaning as a reliable, practical joinery method is well deserved.
Common Mistakes When Cutting Dados
Even experienced woodworkers make mistakes with dado cuts. Knowing what goes wrong helps you avoid the same pitfalls. Here are the most common errors and how to fix them.
Cutting the wrong width. This happens when the router bit or dado stack is not set correctly. Always double-check the width against your project plans before making any cuts. A quarter-inch difference can mean the difference between a snug fit and a loose joint.
Cutting too deep or too shallow. The dado depth affects how well the joint holds. Too shallow and the piece will wobble. Too deep and you weaken the surrounding wood. Use the one-third rule and always test on scrap first.
Forgetting to account for blade kerf. The kerf is the width of material removed by the saw blade. When you make multiple passes with a table saw, the kerf removes a tiny bit of material each time. If you do not account for this, your final dado width will be slightly off. Plan your passes accordingly and test frequently.
Rushing the setup. A sloppy setup leads to uneven cuts. Take the time to square your fence, check your depth gauge, and verify your measurements. A few extra minutes of setup save hours of fixing mistakes later.
Ignoring wood grain direction. When cutting a dado by hand, the direction of the grain matters. Always chisel and plane with the grain to avoid tear-out and splintering. Going against the grain leaves rough edges and can ruin the appearance of the joint.
Expert Tips For Perfect Dado Work
Mastering the dado takes practice, but a few expert tips can speed up your learning curve dramatically. Here are some tried-and-true methods that experienced woodworkers swear by.
- Use a featherboard. A featherboard holds your workpiece firmly against the fence or table surface. This prevents the wood from drifting during the cut and gives you a much straighter dado groove.
- Make multiple light passes. Instead of trying to cut the full depth in one pass, raise the blade or bit a little at a time. Three or four light passes produce a cleaner cut with less strain on your tools and your wood.
- Clean up with a chisel. After cutting a dado with a router or saw, go over the edges with a sharp chisel. This removes any fuzzy fibers and gives the groove a crisp, professional finish.
- Label your test pieces. Keep track of which test pieces correspond to which settings. This saves you from having to re-cut test pieces when you move on to a different project.
- Apply paste wax to your router base. A smooth, waxed base helps the router glide through the cut with less friction. This reduces heat buildup and gives you a cleaner groove, especially in hardwoods.
These tips may seem small, but they make a big difference in the quality of your dado work. Consistent practice with these techniques will help you produce clean, tight-fitting dados every single time.
How Dado Work Has Evolved Over Time
The dado meaning has stayed the same, but the way we create dados has changed dramatically. In ancient Egypt, craftsmen used copper tools to cut grooves into wooden furniture and sarcophagi. These early dados held panels in place and gave wooden structures a refined appearance.
During the Industrial Revolution, the invention of the table saw and the development of the dado stack made dado cutting faster and more accessible. Furniture factories could produce thousands of identical dados per day. This efficiency helped make dado-jointed furniture affordable for everyday households.
Today, modern dado router bits and computer-controlled cutting machines have taken precision to a new level. CNC routers can cut perfect dados based on digital designs, ensuring consistency across large production runs. Yet many woodworkers still prefer hand-cut dados for custom furniture. There is something satisfying about the craft of cutting a dado by hand that machines cannot replicate.
The dado rail in interior design has also evolved. While traditional raised-panel wainscoting remains popular, modern designers now use dado rails with flat panels, textured wallpapers, and even paint techniques to create contemporary looks. The dado rail has become more of a design choice than a structural necessity, though it still offers practical wall protection.
Looking ahead, the dado will continue to be a fundamental technique in both carpentry and design. Its simplicity, strength, and versatility ensure that it remains relevant no matter how much technology advances. Whether you are using a high-tech CNC machine or a hand plane, the dado meaning stays the same: a groove that connects, holds, and beautifies.
Final Thoughts On Dado Meaning
The dado meaning in carpentry and interior design covers far more than just a simple groove in a piece of wood. It represents a foundational joinery technique that has stood the test of time. From ancient furniture to modern cabinetry, the dado joint continues to be one of the most practical and reliable methods for connecting wood pieces securely.
In interior design, the dado rail and wainscoting applications bring architectural elegance to walls, adding depth and character to rooms of all styles. Whether you are building a bookshelf, installing paneling, or simply trying to understand how your favorite furniture is constructed, knowing the dado meaning gives you a deeper appreciation for the craft.
The best part is that dado work is accessible to woodworkers of all skill levels. With the right tools, a little practice, and attention to detail, anyone can cut clean, strong dados. Start with simple projects like a basic shelf unit, and as your confidence grows, you can tackle more complex furniture and design pieces.
So the next time you see a groove in a piece of wood, you will know exactly what it is and why it is there. The dado meaning is more than just a definition. It is a gateway into the world of woodworking and interior design that rewards curiosity and practice in equal measure.
Grab some scrap wood, set up your router or table saw, and start practicing. You will be amazed at how quickly the technique becomes second nature. Happy woodworking, and enjoy the satisfaction of mastering one of the most essential skills in the craft.
Frequently Asked Questions
What is the dado meaning in simple terms?
A dado is a groove or slot cut across the grain of a piece of wood. It is used to hold shelves, panels, or other pieces securely in place. The dado is one of the most common and reliable joinery methods in woodworking.
What is the difference between a dado and a rabbet?
A dado is cut across the face of a board, while a rabbet is cut along the edge. Both are grooves, but their orientation is different. A dado runs perpendicular to the grain on the face, and a rabbet runs parallel to the grain on the edge. Both serve similar joining purposes but are used in different situations.
What tools do I need to cut a dado?
The most common tools are a router with a dado router bit, a table saw with a dado stack, or a hand saw and chisel for traditional work. Each tool produces clean dado cuts when set up correctly. A shoulder plane helps clean up the edges for a professional finish.
Why is a dado joint so strong?
A dado joint is strong because the surrounding wood presses against the sides of the groove, creating friction. The cross-grain cut prevents the joint from splitting along the wood fibers. When glued or pinned, a dado joint becomes even stronger and can last for generations.
What is a dado rail in interior design?
A dado rail is a horizontal molding strip attached to a wall, usually about three feet from the floor. It marks the transition between the lower paneled section and the upper wall surface. It serves both a protective and decorative purpose in room design.
Can a beginner learn to cut dados?
Absolutely. Cutting dados is one of the first joinery techniques beginners should learn. Start with simple practice pieces, use a dado router bit or table saw setup, and always test your cuts on scrap wood first. With a little patience, you will be cutting clean dados in no time.
=== CONCLUSION ===
The dado meaning in carpentry and interior design is a topic that blends practical skill with creative expression. Whether you are a woodworker building furniture or a designer adding architectural detail to a room, understanding dados gives you a powerful tool in your kit. From the basic groove cut to the elegant dado rail, this technique has shaped woodworking and design for centuries. Keep practicing, keep learning, and let the dado meaning inspire your next project.